Background

King II-class Battleships are the essential backbone to King Alex "The Just"'s political, military, and economic agenda for the Kingdom of Jod.
The first class of warship designed under the Navy Modernization Program, the ship is designed to be on par with the latest military technology in the Outside Galaxy. Able to act as a tough Battleship during times of war, a Command Ship, or even a Carrier, the King II-class Battleship surpasses it's older brother, the King-class Battleship, in every way: better armor, better shields, better weapons. The focus of adding bow weaponry, to address the major short-coming of the original King-class Battleship, was of major note and the added weaponry gives the new King II-class Battleship the ability to better pursue enemy targets.
Design
The latest---and biggest---internal change to the King-class model of warships is the crew. While the King II is bigger then it's original brother, the crew size has been reduced by 10,369 crew members for a ship it's size; also, the reactor has been reduced in size, yet is more powerful. The reduction in crew and the reactor size has allowed more room for back-up generators, less strain on the life support system, and more hanger space. The reduction in crew size is made possible by a newly developed (and tested) advanced AI system---from a secret research space station in the Northern Stretch---that helps to pick-up the loose ends from a reduction in crew size. The AI's safety limits eliminates the possibility of the AI taking over the vessel, rather restricting the AI to tasks and duties that replaces the 10,000 crew member reduction.
In addition to an AI, the King II-class Battleships are using a prototype Hypermatter annihilator reactor that is more stable then it's Clones War era counterparts; also, the engines are testing out a system to reduce engine heat and waste as to lower the ship's sensor profile.
Included in the additions to the ship, the King II-class Battleships come equipped with state-of-the art:
- The Battleship has 2 "live fire" holograpic battle simulation rooms, known as Simulation Rooms, similar in appearance to the Danger Room and is large enough to hold up to 100 people. Using Hologram technology, the rooms can reproduce whole battle landscapes in live color, rendering hologram projections in real color instead of the blue-line projections for communication purposes. Strategic Command Army Troopers (SCA Troopers) make excellent use of these facilities, as do naval officers and crew reviewing old battle footage for study, etc. The use of these facilities is almost limitless, however is restricted to military use only and not private use. The use of these facilities is strictly regulated by the Lieutenant Commander of the vessel and all requests must be made to him before use is permitted. One of the Simulation Rooms has been reserved for Royal Command use and is not limited through the Lieutenant Commander's orders.
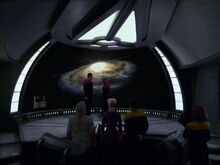
- The ship is equipped with an Astrometrics Lab near the base of the command towers.
Manufacturer: Royal Engineering
Line: King
Model: Battleship
Class: Star Destroyer (see Anaxes War College System)
Role:
Cost: Not Available for Sale
- Roughly the same around of an Imperial I-class Star Destroyer (costs are saved through building direct, verses contracting out to other shipyards)
Length: 1,600 Meters
Height: 210 Meters (40 decks of livable space; 30 decks or 90 meters of non-livable space: hanger bay, reactor core, etc.)
Maximum Acceleration: >2,750
MGLT: 65 MGLT
Maximum Speed (atmosphere): 1,000 km/h
Engine Units: 6 Royal Engineering Fighter-class Super Engines
Hyperdrive Rating (Red Rock-infused): Class .10
Hyperdrive Rating (normal, back-up): Class 2 back-up
Power Plant:
- 1 primary Hypermatter annihilator reactor
- 2 secondary (15% the size of primary) solar fed back-up reactor cores (charged at 100%, can be recharged by the main reactor or solar panels; can be used with main reactor to support energy out-put for weapons, shields, sensors, and communications)
Shields: Redundant shields, rated to Imperial II-class Star Destroyer
Armor (Hull Plating): Titanium-reinforced Alusteel with Quadanium Steel frame. Bridge, Clean Deck, Security Office, Hanger Bay, and Reactor Core (Power Plant) are furthermore hardened with Durasteel. Rated to Executor hull strength.
Sensors: Rated to Imperial II-class Star Destroyers; other "additional" abilities classified by the House of Royal Intelligence.
Communications: Rated to Imperial II-class Star Destroyer,including specifics:Frequency Agile subspace transceiver
Ranger transceiver
Radionics
2 Rectenna (refitted for starship's size and use; one fitted on each rear of the bridge domes)
Whistler encryption module
ion-scrambler
Sub-space image transmitter
Subspace transceiver
Holocomm
Holotranceiver
Holo-transmitter
Hypercomm
hyperradio
hyperwave transmitter
Targeting Systems: St2x targeting computer (refitted for starship's size and use)
Cargo Capacity: 26,000 metric tons
Consumables: 2 years
Crew: 26,716
- Starship Personnel Only (SPO):
- Command Staff: 102
- Officers: 6,161
- Enlisted: 20,091
- Gunners: 275
- Medical Staff: 362
- Naval Shuttle Pilots & Crew: 146
- Naval Recovery, Rescue, & Cargo Pilots & Crew: 66
- Naval Maintenance Technicians (2-Personnel Crew per shuttle): 58
- Naval Guard: 2,998
- Naval Reconnaissance Troopers: 10
Passengers: 10,731
- Starship Fully Equipped (SFE): 37,447
- Starfighter Corps (648)
- Starfighter Pilots: 204
- Starfighter Technicians (3-Personnel Crews per Starfighter): 360
- Blastboat Pilots: 48
- Blastboat Technicians (3-Personnel Crews): 36
- Army (10,083)
- Command Officers: 3
- Administrative Detachment: 53
- Command & Control Post Personnel: 60
- Army Garrison Detachment Personnel: 740
- Infantry: 3 Infantry Brigades (8,347 SCATs)
- Special Operations: 2 15-personnel FTUs (30 soldiers)
- Diplomatic Security Force & Honor Guard: 1 Company (100 King's Army Soldiers)
- Army Medical: 252
- 9 Army Regimental Doctors
- 27 Army Regimental Nurses
- 36 Army Medical Assistants
- 180 Combat Medics
- Army Mechanics: 104
- Army Pilots & Vehicle Crew (Ground): 326
- Army Pilots (Air): 68
- Starfighter Corps (648)
- Command Officers: 3
- Commanding Officer; Captain
- Executive Officer; Commander
- Second Officer; Lieutenant Commander
- Command Crew: 13
- Chief of Security (Naval Guard Brigade Commander)
- Chief Medical Officer
- Chief Navigator
- Chief Engineering Officer
- Chief Gunnery Officer
- Chief Communications Officer
- Chief Logistics Officer
- Chief Controller
- Chief Sensors Officer
- Chief Maintenance Officer
- Hanger Chief
- Wing Commander
- Strategic Command Army Trooper Major General
- Command Subordinates (Bridge Officers): 86
- Security (4)
- Master-at-Arms (Naval Guard Lieutenant Commander)
- Political Officer
- Diplomatic Officer
- HRI Staff Officer
- Fleet Intelligence Officer
- Army Intelligence Officer
- Medical (3)
- 3 Medical Management Officers
- Navigation (6)
- 3 Pilots (men or women)
- 1 Chief Helmsmen (Captain's shift)
- 1 Senior Helmsmen (Commander's shift)
- 1 Helmsmen (Lieutenant-Commander's shift)
- 3 Co-Pilots (men or women)
- 1 Senior Assistant Helmsmen (Captain's shift)
- 2 Assistant Helmsmen (Commander or Lieutenant-Commander's shift)
- 3 Pilots (men or women)
- Engineering (2)
- 1 Senior Engineer Officer
- 1 Engineer Officer
- Communications (6)
- Logistical (6)
- 3 Quartermasters
- 1 Master Chef (Private Mess Hall)
- Assisted by 2 organic cooks, but only for the other two shifts (one cook per shift)
- 1 Lead Chef (General Mess #1 and/or Private Mess Hall #2----State & VIP Rooms)
- Assisted by 6 organic cooks per shift (18 cooks total)
- Assisted by 2 organic cooks in the Private Mess #2 for shifts 2 & 3, one cook each shift (2 cooks total, taken from General Mess #1)
- 3 Chefs (General Mess #2, #3, #4, and #5)
- Assisted by 6 organic cooks per shift (18 cooks total) in each General Mess (72 cooks total)
- Controller (3)
- Sensors (3)
- 3 Sensors Officers
- Maintenance
- 27 Maintenance Officers
- Hanger (18)
- 3 Starfighter Corps Support Officers
- 3 Naval Support Officers
- 3 Army Support Officers
- 3 Naval Munitions Officers
- 3 Traffic Officers
- 3 Emergency Control Officers
- Starfighters (6)
- 6 Wing Auxiliary Officers
- Security (4)
- Officers: 6,161
- Enlisted: 20,091
- Medical Staff: 362
- 8 Medical Support Staff
- 12 Medical Auxiliary Staff
- 15 General Practice Doctors
- 12 Emergency Medicine Doctors
- 57 Nurse Practitioners
- 99 Nurses
- 159 Medics
Armament
182 weapon emplacements.
8 Arrow: 2 port / 2 starboard top arrow; 2 port / 2 starboard bottom arrow
4 Bow: 2 top, 2 bottom
8 Middle: 4 across the "middle" section of the ship, both port and starboard
8 Middle: 4 port along the "middle," 4 starboard along the "middle" 2 Bow: 1 top, 1 bottom
32 Arrow: 8 port top / 8 starboard top; 8 port bottom / 8 starboard top
10 Middle: 5 port, 5 starboard
14 Bow: 7 top bow, 7 bottom bow
6 Aft: 3 top, 3 bottom
20 Arrow: 10 top arrow, 10 bottom arrow
20 Middle: 10 port, 10 starboard
20 bow:10 top, 10 bottom
10 Aft: 5 top, 5 bottom
4 Bow: 2 top, 2 bottom
6 Middle: 3 port, 3 starboard
4 Bow: 2 top, 2 bottom
6 Bottom: around hanger bay
Complement
Naval Shuttle Complement
- 3 Aka'jor-class shuttles
- 4 Nu-class attack shuttles
- 12 Sentinel-class Landing Craft
- 2 Gamma-class assault shuttle
- 2 Y-4 Raptor-class Transports
- 2 CR25 troop carriers
- 3 Hammer Strike-class Landing Craft
- 1 IF-120 landing craft
Naval Rescue, Recovery, & Cargo Complement
Starfighter Corps & Blastboat Complement
- 4 T-65 X-wing starfighter squadrons
- 3 BTL-S3 Y-wing starfighter squadrons
- 2 Aggressive ReConnaissance-170 starfighter squadrons
- 1 Eta-2 Actis-class light interceptor squadron
Total: 120 starfighters
- 12 GAT-12 Skipray Blastboats (various models)
Army Ground Complement
152 ground vehicles
- 1 Command Company
- 1 Light Reconnaissance Company
- 1 Heavy Reconnaissance Company
- 1 Logistical Battalion
- 1 Transport Battalion
- 2 Naval Deployment Battalions
Army Aerial Complement
Deck-Plan & Special Notes
Starboard & Port Bridges
- Starboard Bridge (Primary Bridge & War Room)
Oval shape design with front windows wrapping around the front part of the bridge from top to bottom. Two
decks; the first, lower deck, houses crew stations for the various functions of the ship. Upper deck houses the Captain & Commander stations and the Security Station & Fleet Intelligence Stations..
First Level (Bridge)
The Helms Station (bow; first level); Positioned in the middle front of the bridge, they have a full unobstructed view of space in front of them.
Wrapping around in the oval shape bridge to either side of the Helms Station are 4 "Stations" to each side (8 in total). All the stations are angled and positioned in a way as to get a front view of the bridges' viewports, but also allow easy access around each console.
Gunnery Station (port; first level); The gunnery station is directly to port and behind the Helms Station by about 10 yards. The Station consists of five consoles: four Type Four Control Consoles sit up front side-by-side in a semi-circle fashion; each console, left to right, controls gunnery from aft, port, bow, & starboard respectfully.
A fifth console sits behind the four consoles and is a FarSight Control & Monitoring Console and supervises the four Gunnery Officers at the four Type Four Control Consoles and the whole weaponry operation aboard the King II. This fifth console is manned by the Chief Gunnery Officer (during combat and a Gunnery Officer during non-combat) and a Senior Gunnery Officer.
In between the four front consoles and fifth rear console are three holographic imagines along the wall and a fourth solid print imagine below them along the port wall. The three holographic imagines show a live-feed holographic interfaced imagines of 1) Incoming enemy fire, 2) Where enemy fire is landing on the King II and damage assessment, and 3) A duplicate sensor imagine from Sensors Stations showing where enemy craft are at. The fourth solid print imagine below the three show the weapon emplacements, weapon loading tracks, & weapon energy pathways on a colorful blueprint of the ship with the armor taken away. While these four imagines are not necessary, as each of the consoles can bring up the same imagines, it provides another resource for the gunnery crew and for others on the bridge as well passing by to take a look and not needing to disrupt the gunnery crew operations.
Senors Station (starboard; opposite of Gunnery Station; first level): A singular two person crewed FarSight Control & Monitoring Console 10 yards behind the Helms Station and up against the starboard wall. One Senior Sensor Technician and one Sensor Technician crew the station.
Damage Control Station (port; behind and inwards of the Gunnery Station; first level): Behind the Gunnery Station by 5 yards and inwards towards the middle of the bridge, off-center of the Gunnery Station by 3 yards. Two Type Four Control Console with one crewmen each.
Communications Station (starboard; behind and inwards of the Sensors Station; first level): Behind the Sensors Station by 5 yards and inwards towards the middle of the bridge, off-center of the Sensors Station by 3 yards. A two-person FarSight Control & Monitoring Console.
Hanger Control Station (port; behind and inwards of the Damage Control Station; first level): Behind the Damage Control Station by 5 yards and inwards towards the middle of the bridge, off-center of the Damage Control Station by 3 yards. Two Type Four Control Console with one crewmen each.
ComScan Station (starboard; behind and inwards of the Sensors Station; first level): Behind the Communications Station by 5 yards and inwards towards the middle of the bridge, off-center of the Communications Station by 3 yards. A two-person FarSight Control & Monitoring Console.
Engineering & Reactor Station (port; behind and inwards of the Hanger Control Station; first level): Behind the Hanger Control Station by 5 yards and inwards towards the middle of the bridge, off-center of the Hnager Control Station by 3 yards. Two Type Four Control Console with one crewmen each.
Emergency & Medical Station (starboard; behind and inwards of the ComScan Station; first level): Behind the ComScan Station by 5 yards and inwards towards the middle of the bridge, off-center of the ComScan Station by 3 yards. Two Type Four Control Console with one crewmen each.
Army & Starfighter Liaison Commands (middle; behind all other consoles, directly opposite of Helms Control): Behind all other first level control stations by 10 yards and separated inwards by all other first level consoles by 10 yards. Four Type Four Control Consoles with one crewmen each relay orders & requests back-and-forth between the Port & Starboard Bridges.
Second Level (Bridge)
The second, higher deck, is recessed from the front of the bridge by a quarter of the distant and is a large oval shaped command deck with waist high railing all around it---it breaks in two front areas where 2 small ramps head down to the lower deck---with the Captain's Chair on the starboard side of the deck and the Commander's Chair on the port side of the deck, both a little bit back from the safety railing. Both the Captain and Commander chairs can rotate 360 degrees and the Captain's Chair has a master command arm rest as well. In front of both the Captain and Commander Chairs, recessed into the ground, are two holograpic displays / HoloNet transceivers, that can display live battlefield data and HoloNet communications to both command officers.
Behind the two command chairs and flanking the Captain's Chair is the Security Station (crewed by the Chief of Security or Master-at-Arms during the Captain's & Commander's shift) which is a single Type Four Control Console and flanking the Commander's Chair is the Fleet Intelligence Station, which is also a single Type Four Control Console; this station is manned only by the Fleet Intelligence Officer.
Behind both consoles by 10 yards is a large blast door that is always flanked by two sentry Naval Guards both on the outside and inside of the door's entrance and exit (4 Naval Guards total) around the clock 24/7. Just before the exit and to the port side corner is the War Room (see details below). To the starboard side of the bridge in the corner opposite is the Captain's Ready Room.
Leaving the bridge, one takes a small ramp down into a lobby area (with a refresher & drink/snack station) where two smaller blast doors, each guarded by a Naval Guard each 24/7 around the clock, lead around the second deck ramp and into the lower deck bridge.
Directly aft of the top and lower decks is another large blast door; exiting through the heavy blast door, where two Naval Guards stand sentry duty on either side of 2/7 around the clock, one takes a short walk to a bank of turbolifts and staircases that lead down to the various rooms of the Command Tower or to the super structure of the arrow shape of the ship below. Two Naval Guards stand sentry 24/7 around the clock at the turbolift & emergency staircase.

Captain's Ready Room blueprint

Captain's Ready Room
War Room: Designed for war as the title implies; the War Room is everything tactical that a group of military tacticians could want to run a battle. A circle of large and small holo screens feed live data from a battle to give tacticians the latest edge with touch screen commands and voice commands. A large holo projector sits in the far side of the circular room, projecting a 3D imagine of the battle in real time. Multiple smaller communication holo projection stands and HoloNet transceivers got the room's outer wall, giving each tactician a face-to-face with field officers and
far off superior commanders. The room can house twenty people total, have 8 work stations (with computers and other communication and sensor equipment) with a chair each along the walls (4 on each side) towards the blast door entry and exit, and the War Room itself has a around the clock Naval Guard double sentry flanking either side of the heavy blast door leading into the War Room (even when not in use).
- Port Bridge (Starfighter Command and Infantry Command)
The port bridge is identical to the starboard bridge in every way (including the Naval Guard sentry locations) except for the fact that the Helms Station is removed up front and is replaced by a tactical observation post (with emergency back-up bridge controls in case the primary bridge is destroyed), which is staffed by 3 officers who act as look-outs and battlefield liaisons between the command staff and the field commanders. The other difference between the two bridges is the function of the 8 stations and their staff; whereas the starboard bridge handles the warship concerns, the consoles for the port bridge (nicknamed "Starfighter Command" by most) deals with hanger bay, starfighters, shuttles, and infantry concerns. The third difference is the removal of the "War Room" and the addition of two Ready Rooms in each rear corner of the bridge; the port side one for the Army General Ready Room (port side of bridge), the starboard side office for the Wing Commander Ready Room (starboard side of the bridge). Both Ready Rooms are smaller then the War Room and look like the Captain's Ready Room (pictured above).
The second level deck, where the command chairs are at for the starboard bridge, are replaced with the Wing Commander on the starboard side and the Army General on the port side. Both the port and starboard bridges have liaison officers to each bridge for proper secure and correct communication and also share live audio and holo feed chats during all combat operations. The War Room in the starboard bridge houses officers from both bridges for a mission, allowing both sides to communication face to face in the heat of battle.
Bridge Towers (5 decks)
- Both Bridge Towers (Conference Room Deck): Conference Rooms Level A & B and Security Offices
- Conference Rooms & Security Offices are located one deck below each Bridge.
Strangely quiet, the Conference Room Deck has secured access via the Clean Deck below it (see below); regardless, it still maintains a double Naval Guard sentry around the clock, 24/7 in it's turbolift/emergency staircase lobby. A single lone refresher and drink/snack station is also in this lobby. The Conference Room Deck also houses the Security Offices.
The entire deck composes of one Conference Room A, two Conference Room B's, & 6 Security Offices, in additional to numerous supply & equipment closets. Four King's Army Soldiers, split up into two teams of two sentries each, patrol the lonely and mostly deserted corridors. This deck is often called the Ghost Deck because of it's rare use, yet the 8 Naval Guards and King's Army Soldiers that call it home for 8 hours each day (in addition to the 6 officers).
The deck also houses the Security Offices for the Master-at-Arms, Political Officer, Diplomatic Officer, Fleet Intelligence, Army Intelligence, & HRI Staff Officer and the 6 officers that call those offices home.
Conference Room Level A; (2 total, 1 in each bridge tower):
Highly secured, double Naval Guard (around the clock, 24/7, even with no meetings in progress) sentry flanking a eye scan and security code heavy blast door; the primary door is video recorded around the clock. Sound proof and sensor proof walls, for 12 people or less, are rectangular in size with all oak wood walls and a white ceiling. Lights are recessed into the ceiling, while a long rectangular heavy oak table with holo screens build into the table account for all 12 puffy black office chairs with wheels. Each conference room has white carpet and a large holo-projector / HoloNet transceiver built into the middle of the solid oak table. Flags of all the Regions of the Kingdom of Jod adore the walls at various places with holo and still photos of the Kingdom of Jod on the walls as well. A massive flag of the Kingdom's Navy addresses the far wall, opposite the single heavy blast door leading and leaving the conference room, and a flag pole on each side of the massive flag and in the corner of the room hold the Royal Palace flag to the left of the room and the Queen's Guardsmen to the right of the room. A small refresher station with drinks and snacks is built into a side panel in each Conference Room Level A; also, there is a small refresher station built into the side wall with a privacy door. Finally, each Conference Room Level A also has a hidden emergency exit door built into the side wall in case the conference room is attacked: the hidden passage way leads to a sound-proof and sensor-proof Safe Room with enough supplies to last 3 days.
Rooms are designed for highly sensitive discussions of classified nature and blast doors are very thick; communications in the conference room can completely encrypted communications to warships, planets, and undercover assets around the galaxy. The Conference Room Level A is soundproof & sensor proof, preventing ease drooping. Hidden cameras, sensors, & other technology built into the ceilings, walls, & floor prevent (and can detect the use of) the use of spy technology and scramble all unauthorized communications and other signals leaving the Conference Room Level A.
Conference Room Level B; (4 total; 2 in each bridge tower; located in middle decks of both bridge towers):
Medium security with a double Naval Guard (during meetings only) sentry flanking the outside of a security code and eye scan secured medium blast door. Sound proof & sensor proof walls, circular in shape; designed for 30 or fewer people, with a all-gray wall, gray carpet, and white ceiling with recessed lighting. Walls are adored with flags from the Regions of the Kingdom of Jod and military branches; holo and still photos from the Kingdom of Jod adore the wall as well. One massive solid wood oak table with 30 black puffy office chairs with wheels is in the center of the conference room. Each place of sitting on the table is given a data-pad and important meeting notes, while a massive holo projector and HoloNet Transceiver is built into the middle of the table.


- Both Bridge Towers (Escape Pod Deck Alpha & Bravo)
- Escape Pod Deck Alpha (Starboard Bridge) & Bravo (Port Bridge) are located one deck below the Conference Room Deck.
Escape Pod Deck Alpha & Bravo are specifically reserved for the Starboard & Port Bridges respectfully (40 personnel & guards in each bridge), Conference Room Deck (16 personnel & guards in each), and Clean Deck (67 personnel & guards in each). Both Alpha & Bravo Escape Pod Decks each hold 12 (24 combined) Class-6 Escape Pods, giving each Escape Pod Deck one extra escape pod then needed.
- Both Bridge Towers (Clean Deck); Security Check Point Alpha & Bravo
- Clean Deck is located one deck below Escape Pod Deck Alpha (starboard) & Bravo (port).
These 3 Security Check Points are staffed 24/7 around the clock and are the entry way onto both Bridges & Conference Rooms Level A & B and the below Clean Deck points below; One checkpoint admits access to the Bridge, while the other two Checkpoints admit access to the rest of the deck from the Lobby Entrance onto the Deck. Four King's Army Soldiers, two each, stand sentry to either side of the lone turbolift and lone emergency staircase heading to each Bridge. A security barrier prevents unauthorized access around the Security Check Points.
In addition, these decks have a single secure refresher area with a snack & drink station to the side located in the deck lobby area (secured meaning eye scan and hand scan greater glass room surrounding the refresher and snack/drink station) with a double Naval Guard detachment standing sentry outside. All other refreshers and drink/snack stations are not secured in this manner, but due to the sensitivity of this deck, these refreshers and drink/snack station are.
Lastly, the Lobby Entrance onto the Deck has a Post Security Office opposite the refresher that is staffed around the clock 24/7.
The rest of the deck is consumed with 7 static-free & lean computer process & data storage rooms (or called Clean Rooms) on each Bridge (each guarded by a pair of Naval Guards around the clock 24/7 standing sentry outside a heavy blast door with hand & eye scanner and monitored by a video camera around the clock).
In addition to the Clean Rooms, several mechanical and electrical storage rooms are scattered throughout the entire deck. Several work rooms can also be located on this deck as well, where repairs can be directly made by computer & console technicians. Through the deck, two patrols of two-man Naval Guard teams patrol throughout the deck.
The entire Clean Deck can be environmentally sealed off from the rest of the ship (also in case a Bridge is destroyed or the ship is exposed to vacuum). The whole deck is encased with an extra layer of hardened Durasteel and has it's own emergency life support system & emergency backup generator supply for up to a week (the power is to keep the important data storage and other computer equipment running). The only and primary way onto the deck is secured by a triple reinforced heavy-duty military-grade blast door that is designed to be environmentally sealed.
The deck also comes with it's own hidden Safe Room (sound-proof & sensor proof) and Emergency Supply Room, which houses enough food, supplies, & weapons for up to a week. The Emergency Supply Room has two Naval Guard sentries flanking it's heavy blast door around the clock, 24/7; the blast door is further equipped with a hand & eye scan reader and is video monitored around the clock. The deck also comes with an Emergency (second) Back-up Bridge that is staffed around the clock 24/7 by a skeleton crew of 4 and has two Naval Guard entries flanking the heavy blast door entrance on the outside and two Naval Guards on the inside of the bridge as well. Both doors (and bridge) are monitored around the clock, 24/7 with video recording, sensors, & scanners. Shifts last for up to 8 hours each.
- Starboard Bridge (Command Officers & Command Crew Quarters)
- Located one deck below Clean Room Deck. All decks of the starship have 3 entrances/exits off of each deck from here on out throughout the rest of the starship.
This deck houses the crew quarters for the Command Officers & Command Crew. Every quarter is designed the same. A single Post Security Office is in the lobby area of the deck and is identical to the one in the Clean Room Deck; it is likewise staffed 24/7 around the clock with 8 Naval Guards and responds only to emergencies on the Command Officers & Command Crew Quarters as a Quick Reaction Force. A single heavy blast door is at the end of each side of the corridor and a third entrance and exit is on the deck; all three blast doors are secured with a double sentry Naval Guard detachment around the clock 24/7 with a hand & eye scan reader on the blast doors and they are video monitored around the clock. Lastly, a single patrol of two Naval Guards walks the deck on patrol 24/7 around the clock.
This deck also houses a private gym for the Command Officers & Command Crew, as well as their own private library & study room, a mini food & snack bar staffed around the clock 24/7 with a single crew member serving drinks and food, and an entertainment room.
Each personal quarter is designed with same carpet as the outside corridor (see below); white walls and ceiling give the room a larger feeling and a large viewport spans the back wall behind the bed. The quarters feature a master bedroom to the rear of the quarters separated by a wall and a thin blast door to the rest of the quarters which feature a small living room complete with small dinner table, couch for entertainment, and a holo entertainment center. To the left of the living room, from the front blast door leading to the quarters, is a half circle kitchen in the corner of the room complete with a island table with 4 stools in the middle of the kitchen. Next to the kitchen and directly left of the main entrance to the quarters is the refresher complete with a door for privacy. Opposite to the refresher, on the wall with the entrance door to the quarters, is a closet with a washer/dryer as well. On the wall next to the entrance to the quarters, opposite the side of the refresher & next to the closet, is a communication screen to the rest of the ship.
These quarters are also the only quarters with "real" running water throughout the entire ship. All other refreshers are sonic-based refreshers throughout the entire ship.
- Port Bridge (Command Subordinates Crew Quarters)
- Located one deck below Clean Room Deck. All decks of the starship have 3 entrances/exits off of each deck from here on out throughout the rest of the starship.
This deck houses the crew quarters for the Command Subordinates. Every quarter is designed the same. A single Post Security Office is in the lobby area of the deck and is identical to the one in the Clean Room Deck; it is likewise staffed 24/7 around the clock with 8 Naval Guards and responds only to emergencies on the Command Subordinates Crew Quarters deck as a Quick Reaction Force. A single heavy blast door is at the end of each side of the corridor and a third entrance and exit is on the deck; all three blast doors are secured with a double sentry Naval Guard detachment around the clock 24/7 with a hand & eye scan reader on the blast doors and they are video monitored around the clock. Lastly, a single patrol of two Naval Guards walks the deck on patrol 24/7 around the clock.
This deck also houses a private gym for the Command Subordinates, as well as their own private library & study room, a mini food & snack bar staffed around the clock 24/7 with two crew members serving drinks and food, and an entertainment room.
The quarters are considerably smaller (quarter the size) then those of the Command Officers & Command Crew Quarters; they feature the general initial layout with a master bedroom with a viewport out to the starts (this viewport is roughly 1/3 the size of the one for the Command Officers & Command Crew Quarters). A wall and a thin blast door separates the master bedroom from the rest of the quarters. The carpet and walls are the same as the Command Officers and Command Crew Quarters.
The rest of the quarters hosts a single table with two chairs inside a small living room with a holoprojection entertainment system against the wall with a couch in front of it. A small "kitchen" with a mini-refrigerator, sonic refresher, food warmer, and three cabinets are behind the living room (no stove or other real "cooking space"). A small refresher with privacy door is next to the kitchen (and to the left of the single entry door into the room); a closet with a washer/dryer as well is to the right of the single entry door.
- Port Bridge Tower (Medical Crew Quarters)
- Located one deck below Command Subordinates Crew Quarters. All decks of the starship have 3 entrances/exits off of each deck from here on out throughout the rest of the starship.
See Officers Quarters below; are identical.
- Starboard Bridge Tower (Astrometrics Lab & Private Mess Hall)
- Located one deck below the Command Officers & Command Crew Quarters.
The Astrometrics Lab has a 24/7 (even when not in use) double sentry Naval Guard detail flanking the heavy blast doors due to the sensitive information held within. Access is restricted via a eye scanner & hand scanner as well (the primary door is video recorded around the clock). The room is soundproof & sensor proof, providing further security with hidden cameras, sensors, & other technology built into the ceilings, walls, & floor prevent (and can detect the use of) the use of spy technology and scramble all unauthorized communications and other signals leaving the Astrometrics Lab. A hidden Safe Room is also provided within one of the hidden panels in the room with enough food for 3 days for 6 people.

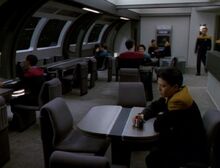
Private Mess Hall (1 total);
Reserved for Command Officers, Command Crew, Command Subordinates, diplomatic guests, and VIPs. Two Naval Guards stand sentry outside the entrance/exit medium blast door around the clock 24/7. A single Chef serves food here.


Private Mess Hall Blueprint

Private Mess Hall rear of Mess view


- Primary Entrance Port & Starboard Bridge Towers
- Located at the base of both Bridge Towers respectfully with the Security Office and Brig in between both Bridge Towers.
These two massive entrance points into each Bridge Tower holds each 12 banks of turbolifts and 4 emergency staircases for each Bridge Tower. Both entrance points are heavily guarded with 1 King's Army Soldier at every other turbolift entrance and staircase entrance (8 total for each Bridge Tower) around the clock 24/7; furthermore, three Security Check Points staffed around the clock 24/7 (with interlaced security barriers in between each) are guarding Port & Starboard Bridge Tower entrance and exit.
Finally, those wishing to access the Bridge Towers must do so with proper security clearance and/or proper orders to do so (a meeting, etc.). At every turbolift lobby (includes a staircase entrance/exit) in both Bridge Towers, there are two Naval Guards standing sentry.
- Security Office & Brig
- Positioned directly in between and at the base of the two Bridge Towers. This massive four deck complex has windows faces out towards the bow of the ship with the primary entrance turbolifts & emergency staircases to both the Port & Starboard Bridge Towers to either side of it.
The massive four deck complex is harden in durasteel and reinforced with Alusteel for extra protection and is furthermore the security nerve center for the entire ship (it can also be environmentally sealed from the rest of the ship and survive off of it's own life support for up to 7 days) with a backup communications system and backup power generator just for the secondary communications system.
The primary entrance and exit (two sets of heavy double blast doors) is guarded around the clock by two Naval Guard sentries per door around the clock 24/7; a third heavy blast door is off to the side of the other two labeled "Brig" with two Naval Guards standing sentry (the Brig door leads directly to the Brig under the Security Office and doesn't connect to the primary Security Office at all). All three blast door access points is furthermore video recorded around the clock with a eye and hand scanner lock on each door. There is finally a single Security Check Point staffed around the clock 24/7 that prevents one to even get close to the to sets of double heavy blast doors (the security barrier wraps around the entire front of the Security Office & Brig).
Once admitted access, one enters into a windowless, heavily blast armored and protected lobby area with chairs, couches, tables, and even a snack station & galactic news holo playing on one of the walls (some people may have to wait for a meeting). Two Naval Guards stand sentry around the clock 24/7 to either side of the heavy blast door that is video recorded around the clock 24/7 with a hand & eye scanner.
Once admitted access again, a person walks past two other Naval Guards that stand sentry on the other side of the door around the clock 24/7 and into a vast open area of staircases leading to a deck below and to a deck above to the sides of the massive room. Offices with closed doors line the wall; a massive holoprojector is in the center of the room and shows a gigantic interactive menu colorful display of the King II, showing all of her decks (exposed without hull plating), access points, and every single life sensor reading on the ship and whre they are headed. Smaller scales of the ship show specific readouts (specific zoomed in sections of the ships, certain demagraohics of population being tracked, sensor & scanner readouts, and communications chatter) and float below the massive ship and around the edges of the holographic station. At least 20 technicians are walking around the console at any given point with datapads in their hands and tasked with a specific duty to direct and manage Naval Guard patrols and sentries and monitor & address security concerns aboard the King II.
Along the back wall of the first deck (roughly 50 meters long) is a massive Naval Guard flag hanging above a single large office that pertrudes from the wall in a half-circular manner with four rectangular window and a single blast door (with eye scanner & hand scanner secured heavy blast door, blast proof windows & walls, and sound proof) facing outwards towards the blast door entrance to the Security Office; this office houses the Naval Guard Brigade Commander that acts as the Chief of Security aboard the King II; there is a single viewport looking out to the stars from the Brigade Commander's office over the bow of the starship. A desk and office chair, computer, filing cabinets, data storage, a waiting table off to the side with snacks & drinks, and two tables in front of the main desk occupy the office. Four Naval Guards spaced evenly along the wall back standing sentry (2 to either side of the Brigade Commander's office).
Taking one of the 4 staircases leading upwards (two to either port or starboard), one enters the top deck with a window view of the stars and bow of the starship along the entire width of the forward wall. Here, a smaller holographic station takes up the middle of the room with 4 technicians around it, but shows just a single blueprint of the King II floating in midair like the large one does on the first level. This room is primarily darker in light and houses an array of communications and sensors stations along both walls that the 30 technicians (15 each) that man each of the 30 consoles monitor for security reasons. Along the back wall (opposite the window) are 15 consoles and 15 technicians that monitor all video camera feeds throughout the entire ship. This deck monitors and keep tracks of all Naval Guard activities aboard the entire starship.
Going back down to the first deck and taking one of the 4 staircases leading downwards (two to either port or starboard), one enters into a massive locker room with equipment, clothes, and other non-weaponry supplies for the Naval Guards on duty that day at the Security Office. Also down here are refreshers and sonic showers, as well as a gym room. Two things of note, each on either end of the room. On the end facing towards the bow of the ship is a heavily secured door with two Naval Guards standing sentry 24/7 around the clock flanking it. This door is extremely heavy and blast proof (and must be opened by two people) and must have a eye and hand scan (as well as video record around the clock 24/7), as well as a special identification card and random access code for the day. This is the ship's Internal Small-Arms Armory and Equipment & Supply Depot for the Naval Guard and King's Army Soldiers and is sensor proof, spy proof, and blast proof (able to withstand a direct starship-grade concussion missile hit).
On the opposite side of the deck are two more Naval Guards flanking a similar door and internal room around the clock 24/7. This room is the Quick Reaction Force Bunker #1.
If one exits the Security Room and enters back through the Brig, they would descend a long corridor lined with sensors, scanners, and video camera until they reach a door that is sealed like and secured like that of Quick Reaction Force Bunker #1 and is flanked by two Naval Guards around the clock 24/7.
Once someone enters into the Brig proper, they pass two more Naval Guard sentries on the opposite side of the door and into a windowless blast proof, sound proof, sensor proof, and spy proof room. The rectangular room is surrounded by sensors, scanners, and video camera; furthermore, a single circular desk (one side facing the blast door and one side facing the cells) with two technicians manning the station is first before anyone who enters with a body scanner and two Naval Guards (one on either end of the body scanner standing sentry with stick scanners); a security barrier prevents unauthorized access to either side of the desk and scanner. Two additional Naval Guards stand on the far side of the Brig up against a blank wall, facing the cells and the far blast door. A lone Naval Guard sentry walks up and down the cells in the middle of the Brig, checking on inmates.
In the Brig, before the security check-point, there is a refresher and snack and drink station along the wall for the guards. The brig, even with no inmates, is fully staffed 24/7 around the clock.
After the security checkpoint station, roughly 24 cells (12 on each side) run along the length of the Brig. The cells' have traditional metal gates, the metal being lightsaber and blast proof and can only be unlocked by a eye and hand scanner, as well as the random access code of the day.
Inmates are also escorted into the Brig by at least two Naval Guards from outside the Brig detachment.
Top Arrow Structure (7 decks)
- Officers' Quarters
- Around the bases of each command tower, 3 decks deep.
Quarters are smaller and similar to Command Subordinates Crew Quarters, however, they lack the master bedroom (instead three beds are up against the wall with a small viewport looking out towards the stars), they have a smaller living room (with holo projector screen & small couch), and no kitchen. The walls and ceilings are gray and the floor is deck plating. A sonic sink and small floor refrigerator is where the kitchen would be and there is a sonic refresher next to. A closet & washer/dryer is opposite the sonic refresher. With 3 officers per Officers' Quarter, each officer is assigned to their Quarter by specialty (engineering, security, gunnery, maintenance, etc.), ensuring one officer is always work a 8-hour shift and the other two are off (working the other two 8-hour shifts).
- Enlisted, Gunnery, & Naval Guard ("Crew Quarters")
- Two locations; first location, spread across the top portion of the "arrow" behind the Bridge Towers (6 decks deep); split into both the port and starboard sides of the arrow. Second location is positioned on the bottom half of the bow's super structure (3 decks deep).
Quarters are similar to Officers' Quarters, however the kitchen has been replaced two bunk beds and the former "master bedroom" has been replaced with two more bunk beds. Finally, the living room has also been replaced with two additional beds. Behind each bunk bed is a small closet. The original closet has been replaced with another refresher (two refreshers in the room). All laundry is done is the ship-wide laundry system. A decently-sized table with six chairs sits in the middle of the room.
Crew Quarters are assigned per specialty (engineering, security, gunnery, maintenance, etc.) with 6 crew members per Crew Quarter. Every two crew enlisted, gunnery, or naval guard has assigned one of three 8-hour shifts, ensuring two crew members are always work and four are always off per each shift.
- General Mess #1
- Forward section of the arrow (starboard), in front of the Bridge Towers.
The General Mess #1 is designed to serve up to 500 personnel at once and has a self-serve buffet bar line where people can choose from any of multiple food items cooked by the organic chefs that day and kept ready hot and filled by cooking droids and 6 other organic cooks per shift. Trays and dishes are at one end of the long bar while napkins, forks, spoons, knives, cups, and fluid selection is at the other far end as you exit the line to go find a seat.
- General Mess #2
- Forward section of the arrow (port), in front of the Bridge Towers.
The General Mess #2 is designed to serve up to 500 personnel at once and has a self-serve buffet bar line where people can choose from any of multiple food items cooked by the organic chefs that day and kept ready hot and filled by cooking droids and 6 other organic cooks per shift. Trays and dishes are at one end of the long bar while napkins, forks, spoons, knives, cups, and fluid selection is at the other far end as you exit the line to go find a seat.
- General Medical Bay #1, #2, #3
- Very forward (tip) section of the arrow (bow), in front of the Bridge Towers, bottom deck.
- General Medical Bay #2 and #3 are both located aft of bridge towers on either extreme port & starboard tips, both bottom decks.
The General Med Bay or Gen Med is a multipurpose general medical bay, with the ability to treat a wide range of problems, but mostly focusing on non-combat injuries (although Gen Meds can easily take trauma & combat injuries).
Each Gen Med is staffed with 1 personnel of the following (a second shift of identical people cover the other 16 hours)
- 1 General Practice Doctor (8 hour shift)
- 1 Nurse Practitioner (8 hour shift)
- 1 Nurse (8 hour shift)
- 1 Medic (8 hour shift)
- 2 Two-Medic Team (mobile; on patrol; 8 hour shift)
- 1 GH-7 Medical Analysis Unit

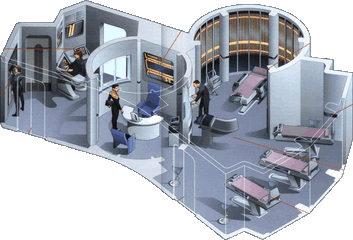
General Medical Bay

- "Live fire" holograpic battle simulation room # 1 & # 2
- Port side of arrow, side-by-side; behind Gen Med #1 and forward of General Mess #1 & #2.
The Battleship has 2 "live fire" holograpic battle simulation rooms, known as Simulation Rooms, similar in appearance to the Danger Room and is large enough to hold up to 100 people. Using Hologram technology, the rooms can reproduce whole battle landscapes in live color, rendering hologram projections in real color instead of the blue-line projections for communication purposes. Strategic Command Army Troopers (SCA Troopers) make excellent use of these facilities, as do naval officers and crew reviewing old battle footage for study, etc. The use of these facilities is almost limitless, however is restricted to military use only and not private use. The use of these facilities is strictly regulated by the Lieutenant Commander of the vessel and all requests must be made to him before use is permitted. One of the Simulation Rooms has been reserved for Royal Command use and is not limited through the Lieutenant Commander's orders.
- State Rooms, VIP Rooms, Private Gym, Private Wet Bar, Private Entertainment Room, Private Mess Hall
- Starboard side of the arrow, behind Gen Med #1 and forward of General Mess #1 & #2.
State Rooms (6 total) and VIP Rooms (6 total) are identical to Command Officer & Command Crew Quarters. There is also a private gym, private wet bar, private entertainment room, and finally a Private Mess Hall #2 identical to the one in the Starboard Bridge. This section of the King II is strictly off limits and is heavily secured with a single way in & out of the area, secured with a single Security Check Point. In addition, a Post Security Office is also located here.
This area can also be sealed off from the rest of the ship environmentally with it's own life support system for up to a week. It also includes a Safe Room.
A heavy blast door separated the Security Check Point from the State & VIP Rooms; once inside, immediately available ahead are a row of twelve rooms (6 to each side), which housed the State & VIP Rooms to each side of the corridor. After the rooms was a circular lobby area with four two-seat red couches along the walls with exotic plants interwoven between them; the circular lobby had four corridors leading out of it; one back to the rooms (and blast door), one ahead which lead to the distance Private Mess Hall #2 and Safe Room; the corridor to port lead to the gym and Post Security Office, while the corridor to Starboard lead to the private entertainment room and wet bar, which both featured a view of outer space through viewports. The whole State & VIP area floor was gray carpeted with several exotic plants along the corridors with various holographic imagines of the Kingdom of Jod along the egg white corridors' walls with recessed lighting in the ceiling; a solid granite rock strip ran along the corridors on either side roughly waist high.
Bow Super Structure (6 decks; 3 decks dorsal, 3 decks ventral around main structure of ship)
- Game & Relaxation Decks
- All 3 dorsal decks of the Bow Super Structure.
Three whole decks dedicated to gyms, relaxation, and gaming for the entire ship. Features the only wet bars on the entire ship.
- General Medical Bay #4
- In the main structure of the ship, in between the upper and lower halves of the Bow Super Structure
The General Med Bay or Gen Med is a multipurpose general medical bay, with the ability to treat a wide range of problems, but mostly focusing on non-combat injuries (although Gen Meds can easily take trauma & combat injuries).
Each Gen Med is staffed with 1 personnel of the following (a second & third shift of identical people cover the other 16 hours)
- 1 General Practice Doctor (8 hour shift)
- 1 Nurse Practitioner (8 hour shift)
- 1 Nurse (8 hour shift)
- 1 Medic (8 hour shift)
- 2 Two-Medic Team (mobile; on patrol; 8 hour shift)
- 1 GH-7 Medical Analysis Unit

General Medical Bay
Bottom Arrow Structure (7 decks)
- Starfighter Corps & Shuttle Pilots/Crew ("Pilots' Quarters"; 1/3 deck)
- On the bottom portion of the "arrow"; on the port side (1/3 of port) of the bottom arrow and above the "Army Barracks".
Quarters are similar to Officers' Quarters, however the kitchen has been replaced two bunk beds and the former "master bedroom" has been replaced with two more bunk beds. Finally, the living room has also been replaced with two additional beds. Behind each bunk bed is a small closet. The original closet has been replaced with another refresher (two refreshers in the room). All laundry is done is the ship-wide laundry system. A decently-sized table with six chairs sits in the middle of the room.
Pilots' Quarters are assigned per squadron, ensuring that each squadron is kept together. This also ensures the whole room is empty for a 8-hour shift.
- Army Barracks (1 deck & 2/3 another deck)
- On the bottom portion of the "arrow"; split into both port and starboard sides of the bottom arrow and below the "Pilots' Quarters". One deck (on starboard) is higher and even with the Pilots' Quarters on port side.
For the 10,083 soldiers & personnel for the King's Army aboard the Battleship, the "Barracks" are split into two sections; each section houses 5,042 soldiers each; one section takes up the port bottom arrow (and 2/3 of a deck above it), while another section takes up the bottom starboard arrow. The soldiers are divided into crew quarters like that for the Enlisted naval crew members.
In 3 massed cargo hold-style staging areas in between both the Primary Hanger Bay & Secondary Rear Hanger Bay (with two entrances/exits, one from the Army Barracks and one to the Secondary Rear Hanger Bay), soldiers can rush directly from the barracks, collect weapons and other combat gear from locked weapon cases controlled by Naval Guard units.
Each cargo hold staging area can hold up to 300 soldiers each and the far walls above the entrance and exit blast doors leading to the Secondary Rear Hanger Bay are 3 massive holo displays which show combat information, military intelligence on the mission, and unit expectations (all of this combat data has already been downloaded to company and platoon leaders' data-pads before the mission became a mission). Once all soldiers are equipped, three massive ramps lead down into the Secondary Rear (and smaller) Hanger Bay for troop deployments and shuttle flights.
Hanger Bays (Primary & Secondary Rear Hanger; 4 decks of Bottom Arrow Structure)
- Primary Hanger Bay (4 decks + 1 sub-level)
All the starfighters are on circular landing lifts (as shown below in this Jedi Temple photo); after each flight, fighters who need service, their landing lifts are lowered into a under level mechanic pit. The "open" landing pits are then sealed over with a retractable grate to prevent falls. When the starfighters are ready for flight, they are lifted back into position. When starfighters are not in use, for safety reasons, the fighters are lowered into the pits and only "on ready stand by" or quick reaction squadrons are in the flight position top side.
The hanger itself is huge, holding a Imperial gray appearance as the primary color; landing lifts are numbered yellow with large numbers and squadron symbols. Rectangular in shape with a large opening large enough for a CR90 Corellian Corvette in the middle, all the services of fighters and equipment is off to the sides and away from the giant opening. Starfighters, Skypray Blastboats, and repair and recovery craft dot circular landing lifts everywhere. The lifts lower into a under level mechanic pit where all repairs and other service needs are conducted in this massive second under level of a hanger bay. Top-side, aside from the circular landing lifts, other regular hanger bay equipment, droids, personnel, and hover sleds and vehicles dot around.
The hanger has 4 decks and 1 sub-level. The "Pits" or mechanic pits is the bottom level; under the mechanic pits is what is known as the "Dungeon" and holds all fuel, weaponry, other hazardous fuel or material, spare parts, and extra supplies for all the starfighters. Not a true level all by itself, the "Dungeon" is considered a sub-level under the Pits and is not only double layered with blast proofing material to make the sub-level like a armored box, it can also active it's own miniature ray shielding around sensitive fuels and weapons in case of emergencies and the whole sub level itself can be ejected into space in case of a uncontrollable fire as to prevent a explosion too big for the armored casing around the sub level to handle and prevent endangering the rest of the ship.
The other 3 decks---identical in height to the secondary rear hanger bay---display the size needed for the hanger bays. The most upper deck upper decks have catwalks around them and have storage rooms, offices, and break rooms for the hanger staff.
The Primary Hanger Bay has enough room to fit an entire CR90 Corellian Corvette in it's hold.
- Secondary Rear Hanger Bay
Is responsible for all shuttle, transport, & army launches and does not have recessed starfighter circular pads (everything is stored in the open with the extra level used for army storage, lifts carry thr equipment & vehicles up to the main level).
- Trauma Medical Bay #1 & #2
- In between the Primary Hanger Bay & Secondary Rear Hanger Bay and to either side of the 3 massed cargo bays for the Army Barracks.
These Trauma Medical Bays are the largest aboard the King II and can be environmentally sealed off from the rest of the ship with their own life support for up to a week. Because of this, and advanced chemical & biological filters in the air vents, Trauma Medical Bay #1 & #2 are designed to screen people first from away missions on planets or other starships before they reenter the general ship's population and handle "first contact" cases with alien species. Furthermore, Trauma Medical Bay #1 & #2 are called the "Big Three" because of their ability to take severe 1) trauma cases, 2) all combat injuries from the army, and 3) away team checks, 3 of the biggest tasks for any starship medical bay.
In general, Trauma Medical Bay #1 & #2 will take the worst of the worst from any part of the ship, including takes transfers from one of the General Medical Bays.
Trauma Medical Bay #1 & #2 are 7 General Medical Bays combined together in a circular fashion with 7 Bacta Tanks on a circular pattern in the middle of the 7 medical bays, each bacta tank facing a medical bay for use.
Each Trauma Medical Bay is staffed with 1 personnel, or more, of the following (a second & third shift of identical people cover the other 16 hours).
- 2 Emergency Medicine Doctors (8 hour shift)
- 1 General Practice Doctor (8 hour shift)
- 7 Nurse Practitioners (8 hour shift)
- 14 Nurses (8 hour shift)
- 14 Medics (8 hour shift)
Main Structure of the Ship (14 decks)
In between the Bridge Towers, Top & Bottom Arrow Structures, Bow Structure, and Hangers Bays, is the main "meat" of the ship. This is where the ship breathes & operates on day-to-day operations and where 60% of the overall work for the crew is done. Within these countless corridors, work spaces, gun turrets, and bulkheads are two additional General Medical Bays, 20 Post Security Offices, 3 more additional General Messes (#3, #4, and #5), 3 Ammo Magazines, 1 Reactor Core & 2 secondary power reactors, Engineering, Fuel Storage, Food Storage, two additional Quick Reaction Force Bunkers (#2 & #3; one located near engineering/reactor core, the other located near the bow of the ship), and dozens of supply and cargo bays.
History
Coming Soon!!!